In this tutorial, we will look at the easiest way of building a conveyor belt for your factory.
The build itself is very simple, but requires knowledge of the following:
- /setblock – read about it here
- /clone – tutorial to be added
- basic work with command blocks – read about it here
- creating a redstone clock – tutorial to be added
If you are familiar with these, you can read further.
Steps:
1.
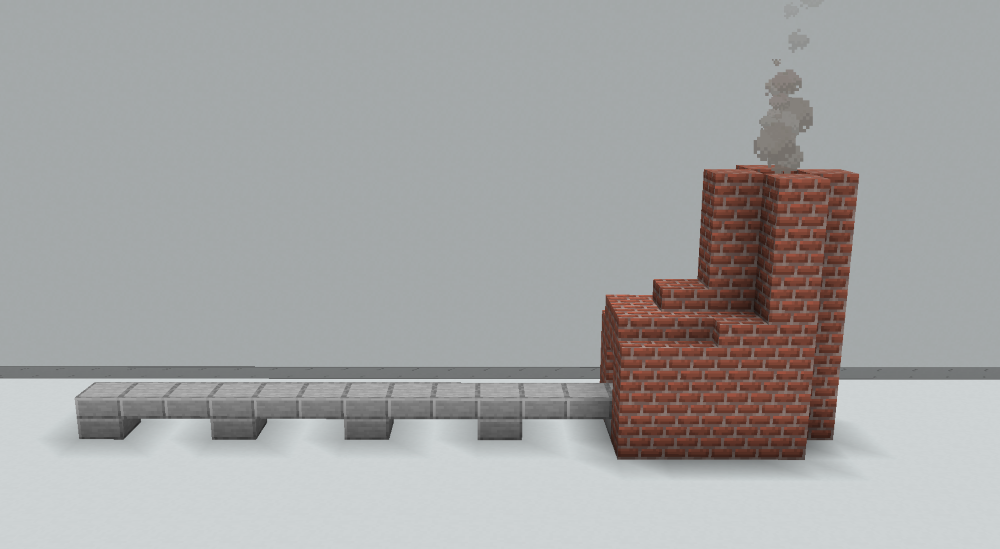
Prepare a basic build, it should look like a long conveyor belt. If you don’t want others to see blocks appear and disappear, you can cover the first and last two blocks. In this picture, only one side is covered.
2.
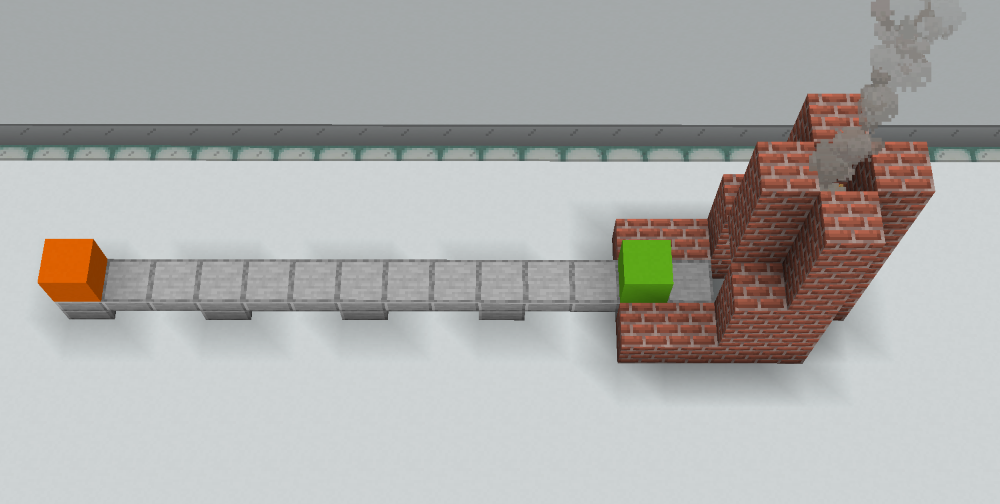
Mark the first two coordinates for the /clone command. Select an area above the belt so that one block on the belt is not included (see the picture below). This is because we will move the selected area forward by one block, and this block will be replaced.
Then, we will start typing the /clone command and use these two coordinates, the resulting command will look like this:
/clone <orange_block_coordinates> <green_block_coordinates> (the order doesn’t matter here)
/clone -197 5 -165 -209 5 -165 (example command, notice how only one number changes – the first one, which resembles the X axis)

3.
The third coordinate is next – we will find the most negative coordinate in the area, and move this most negative block by one space in the direction we want our belt to move in – this is our third coordinate.
In the picture with the area in yellow, the blue block shows where the most negative coordinate is. In the next picture with the area in orange (which displays how the area will look after we’ve moved it), the blue block shows where our third coordinate is.

4.
Now we will finish the /clone command. Because the source and destination areas overlap, we must add two optional attributes:
replace – clone the entire area including air blocks
move – the area is cloned to the selected coordinate and the source blocks are replaced with air
The resulting command should look like this
/clone <orange_block_coordinate> <green_block_coordinate> <third_coordinate> replace move
/clone -197 5 -165 -209 5 -165 -208 5 -165 replace move
(notice that the third coordinate differs by exactly 1)
5.
We still need a way to place blocks at the start of the belt, we can do this using the simple /setblock command.
Select the coordinate of the belt’s start (it’s the orange block in the first picture)
/setblock <belt_start_coordinate> <selected_material>
/setblock -209 5 -165 minecraft:coal_block
6.
We are almost finished, now we need to build a simple redstone clock that follows these rules:
- it will alternate between redstone and command blocks
- the delay between any two command blocks has to be the same, for instance, two repeaters with a delay of one tick = one repeater with a delay of two ticks
- the number of command blocks in the clock will be one more than the gap between individual blocks on the belt
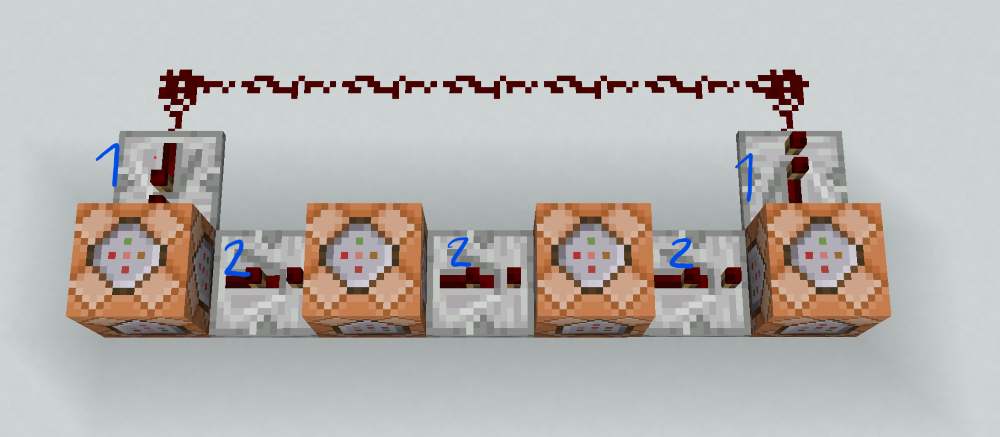
These rules may sound complicated, but they’re easy to understand with a picture. Below you can see a clock prepared for a belt that has a 3 block wide gap between the moved blocks. The blue numbers show the repeater delays.
7.
Paste the /clone command we’ve previously written into the command blocks.
PRO TIP: You can also only prepare one command block and paste the command there, and then copy the command block with the command already inside by using CTRL + scroll wheel click. You can then place the remaining command blocks to finish the clock.
8.
The belt should work now (you can try it out by activating the clock and placing blocks on the belt), but we still need to spawn blocks on it. We can do this by placing a chain command block (the green one) on any command block in the sequence and pasting the /setblock command inside.
Know that the chain command block must be set to always active for this to work.

Done!
You only have to activate the clock now, and your belt will work.
All used commands:
/clone -197 5 -165 -209 5 -165 -208 5 -165 replace move
/setblock -209 5 -165 minecraft:coal_block
Couple of tips to finish off:
- You can make your belt turn by placing another one perpendicular to the first, just make sure their areas in /clone overlap
- We recomment making the gap between blocks at least two blocks wide, so that the belt actually looks like it is moving (instead of alternating between two states)
- You can also move more complex builds on a belt, the belt’s width can even span across multiple blocks. To generate complex builds at the start of the belt, it is best you first build it elsewhere and clone it, replacing the single /setblock command